Not sure where The Tomb of the Unknown King is located from Derring City? view the Worldmap! When you arrive at the tomb, you will see two girls (dressed in Garden uniform) running away from inside. There's a Save Point on the right and a Magic Stone on the left. Head up and cross the bridge. If you know Japanese, you will know that the attendant has given you a map of the tomb (a quite simplistic layout), you can view it while in the tomb by pressing SELECT. If you want to exit the tomb at any point, press SELECT and X and choose the first option.
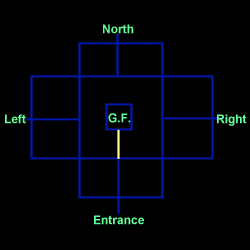
Enter the tomb with precaution, the monsters here are quite tough. You should on a straight path; Straight paths are very important. Head north and you should reach a junction. There is a gunblade with a number (I got the No. 016, but it seems that the password is random each time you play). You could return back to Derring City and complete the next section but you can get another Guardian Force, so here goes; Head right at the first junction and keep heading towards the 'RIGHT' section. You will eventually find a small room with a statue of a figure. Talk to it and it will move! You will now have to fight the first BOSS of the tomb:
After the battle, there is a short talk and Sacred will run away. Heal your party to full health and head up back to the junction. Now head towards the 'NORTH' section and you will eventually reach a small room with wall locked by a chain. Press Circle on the right and Squall will untie the chain, letting water flow out that was previously blocked by the barrier. Next, head back to the junction and keep turning right at the junctions, heading towards the 'LEFT' section. In the small room, you will see a lever on the left and some gears. Now press Circle to activate the gears and water will flow in. You have now activated the bridge leading to the Brothers' hideout. Make your way back to the entrance either by walking or pressing SELECT and the X (which affects your SeeD level). Head towards the area on the map above which is located by a yellow line (i.e. the bridge). Now you will meet Sacred and he will call for his brother, Minotaur. Prepare to fight.
After the defeat of the Brothers, you will meet the dead king's spirit and he will give you the Brother's card. You will now be able to summon them for in battle. Press SELECT and then press X to exit (again, it is best to make your way yourself). Reorganise your party if needed and save your game. Now head back to Derring City.
Head back to Derring City. Those of you who don't like battles will know the importance of having a vehicle. You will be back at the "Rent-A-Car" shop. Head northeast and you will be at a lane. Head right and you will be back at the fountain section. Board the same bus and proceed to the street where you find the attendant outside the Mansion. Now you will be able to tell him the passcode, but you may wish to draw magic from the street on the left of the Park Lane first. Talk to the guy and choose the first option. Enter the code backwards (let's says if the pin is 016, press 6, 1, 0 in that order). If you have entered the code correctly, you will be able head into the mansion. There is a Save Point here, so save your game. Enter the mansion. Once in the mansion talk to Rinoa, and she will talk to Squall for a while. Colonel Karway will enter the hall and greet you and brief you about your mission. If Rinoa is in your party, she will leave your party and you will have to re-organize. The Colonel is actually Rinoa's father, so he doesn't want Rinoa participating in the mission. He will take you out and give you a guided tour of Derring City. Talk to him while at the tower. Next follow him and back to the mansion. A short sequence will occur and your party will divide into two. Squall and Irvine will form a sniping party while Quistis, Selphie and Zell will form the second party to trap the witch. Firstly, you will take control of Quistis and company. Head for the door and you will meet Rinoa. A short event occurs, where Quistis is quite harsh on Rinoa and calls her 'irresponsable rebellious daughter', eventually everyone leaves to do their task... except for Rinoa who feels obliged to help, despite her father's wishes. The action changes to Squall and Irvine. Simply follow Karway and you will end up back at the President's mansion. Now the screen will switch back to Quistis and her party. Head back to the mansion, because Quistis is feeling guilty about Rinoa. You will have a sequence between Rinoa and her father. Rinoa will leave the mansion and head on her own... Quistis and her party comes back only to find they have been locked in by Karway's locking device, meant for Rinoa (she's only 17, you know ^^;) [ Previous Page | Next Page ] |
||||||||||||||||||||